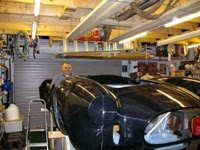
Dave brings us up to date with where he has got to with his GD427 build...
The beginning of the dream - This poster is on the side of a prestige car sales garage in Puerta Banus (near Marbella) They sell Lambos & Bentleys like we've never seen in this country (well in the North anyway)
The build started with stripping a G Registration Jaguar XJS. All the removed running gear components were cleaned with POR Marine Clean and then sandblasted. I could have done with a better compressor as the one I had only allowed me to do 30 seconds work followed by a 3 minute wait for it to recharge. This meant that the whole process took multiple sessions over a 2 week period. I was quite pleased with the end result but wish I had realised that I didn’t need the steering arms as this would have save me 2 hours unnecessary work. The completed parts were treated with POR Metal Ready prior to receiving 2 coats of POR 15.
It was at this stage that I purchased the chassis from GD, set up with Chevy engine mounts. Unfortunately we then moved house and as my Wife needed the new garage for her business the build was transferred to my mother’s single garage – everything had now become a bit of a tight squeeze!
All new bearings, bolts and Universal joints were aquired from Ward Engineering and I reconditioned the hubs myself with the help of a video on You-Tube.
By May 2009 the front and rear axles were completed and fitted to the chassis.
In October 2009 I purchased a Chevy cutout for a rebuild. I Figured it will keep me busy over winter until I can afford to purchase the body! I Hired a trailer from Ripon Trailers and drove down to west midlands to meet Adrian from
AmericanV8Engines.co.uk. We checked casting number which showed 1969 - 1979. Bit of a leap of faith! Adrian sold it as a 2 bolt, but thought it may be a 4 (would be £50 more) - we wouldn't know full spec until I get into the engine.
The engine was safely brought home and fitted onto an engine stand, and the strip down began to strip. I did not rush and followed the instructions explicitly in my book (How to Rebuild the Small-Block Chevrolet by Larry Atherton & larry Schreib ISBN 978-1-884089-95-4 -fantastic!) In total it took 4 x 3 hour sessions to strip and check.
The block and heads were delivered to North East Engines (NEE) in Darlington where they are going to crack test them next week! If it is unusable, I will have to put it all back on a trailer, go back to West Midlands and swap for another. Then strip that one!!! Hasle but at least I do have a warranty.
On initial inspection, engine is un-touched and in good condition and the crank seems fine, a micro-polish should sort it out nicely.
The heads were almost blocked with coke, I guess this is why it was scrapped? The bottom end is in a really goo condition and I think I will be able to get away with just a hone. The guys at NEE agree but everything will be confirmed next week. The best bit is that then engine has turned out to be a 4 bolt mains from 1976 and had been originally fitted to a Camaro – Excellent!
I am thoroughly enjoying the engine re-build so far and would recommend it to anyone!


 Once the body was safely stored next otthe veg patch it was time to carry the chassis round to the garage - George wouldn't have been able to get the trailer round the back lane:


 It was something that I intended to alter during my build and the plans varied from cutting the whole top from the transmission tunnel and lowering it, raising the rear of the tunnel to effectively lower the handbrake to putting spacers on the mounting bolts to alter the angle of the lever. As I am planning to paint the chassis I realised that I would have to make any alterations first.


 I then cut out the parts for the housing, using the Visio printouts for templates, from 1.2 mm steel (display rack shelves salvaged years ago with the knowledge that one day they would prove useful!). The shelves had been coated or enamelled which proved difficult to remove where I was welding up the box but did provide good protection elsewhere. The folds were made in the vice and a bit of “adjustment was required to get the correct fit.
 The parts were then welded up to form the housing after much practice with scrap bits of metal to get the settings right. The welds seem OK but would not win any prizes. I test fitted the box into the chassis and decided to reinforce the housing with additional cross braces at the front and back across the full width of the tunnel. These were cut, formed and welded and test fitted to ensure they provided the planned support.
 All the brackets were then cleaned up with the angle grinder, my new favourite tool, and given a coat of anti rust primer before fitting.
 Owing to the fact that I did not want to rely overmuch on my welding I decided on a belt, braces and elasticated waistband approach and pop-riveted, welded and bolted the housing into the chassis. The whole assembly was then given a coat of anti rust primer paying special attention to the underneath. When dry I bolted in the handbrake and the result was pleasing to my eye.
 First job done only another ???? to go.